Thursday, 27 June 2013

Make Up Look: Temperature Rising!

Hi dolls!


I know some of you have been waiting a while for me to post a summer make up look, so I decided to make a "Temperature Rising" make up look. I love this bronzed look, I think it's great to wear during the day and can be a great night look too! Super versatile, you can pair the bronzed eye with a neutral or bold lip.


I LOVE this collection (see my full review and haul here) and couldn't wait to put a look together with my items! Being inspired by the collection and the packaging, I knew I wanted to do a golden/ bronze eye, flawless bronzed skin with a coral cheek and a neutral lip. This is the look I came up with, along with the products and step by step application.

First - bronzed and dewy skin. I think it's essential for a summer look to have flawless, glowing skin. I started off with a clean and moisturized face and applied my primers - Benefits Porefessional Face Primer, Urban Decay Eyeshadow Primer Potion and MAC Prep+Prime Lip Primer. It's super important that you prep your face in order for your make up to stay put and be long lasting.


After primer, I apply my foundation and buff it out with a Beauty Blender. The foundation I have been using is Dior Airflash Foundation in "300", I spray it on my face and then use the BB to buff it out and correct. Once that's done, I set my foundation with my powder, I'm using MAC Studio Careblend Pressed Powder in "Gold-Go-Lightly" (Surf, Baby! Collection) and apply that with a Sigma Large Powder Brush (F20). After my powder is applied, I will go ahead and contour. Today I used MAC "Nude On Board" Bronzer (Temperature Rising Collection) with my Sigma Contour Brush (F40) and applied it on the hollows of my cheeks, under my chin & neck and on my temples. I know bronzer isn't the best product for contouring, but this bronzer has hardly any shimmer and is not orange-y or reddish what-so-ever! With my summer tan, I find it works well for contouring.


Once my face and powders are done, I start by filling in my brows. I use matte brown eyeshadows by Cargo to fill in my brows with a double ended Sephora Brush (one side is an angled brush which I use to apply the shadow and the other side is a mascara coil which I use to brush out and blend).

Now for the eyes - I used all colours from the Urban Decay Naked Palette to achieve this look. I used "Naked" above the crease, "Buck" in the crease and outer lid, "Smog" on the middle lid, "Dark Horse" on the outer lid and lower lash line and "Half Baked" on the inner lid and inner corner of the eye. I gave my lashes 2 coats of mascara, I used MAC Pro Longlash Mascara in "Pitchblack" before putting on True or False Lashes in "Home Wreckers" to finish the look.


Once my eyes were done, I used a cream concealer for my dark circles and to cover some blemishes. I used Benefits Boi-ing Concealer in "Medium", I like to apply concealer over powder as concealer will always crack under powder with my skin. After concealer I applied my MAC "Ripe For Love" (Temperature Rising Collection) with my Sigma Duo Fiber Brush (F15) to give me a nice summer glow. Last step for face is highlighter - I used my favourite highlighters, Benefit's "Watts Up?" highlighter with MAC Powder Blush in "Honour" over. I only apply highlighter on the tops of my cheeks, on my Cupid's bow, on my chin and browbones. I use a small smudge brush to blend it out into my blush.


And finally my lips, for today I used MAC "Altered Beige" Lusture Lipstick (Temperature Rising Collection) and MAC "Soft Serenade" Lipglass (Temperature Rising Collection) on top. I love the added sparkle this lipgloss deposits on lips! Soo pretty!


There you have it dolls! Hope I didn't keep you waiting too long for this make up look! Still have lots of time to go ahead and try this look for summer!  You don't have to use all the same products that I used to achieve this look, you can use the makeup you have at home! Or try other colour combinations to suit your skin tone. I would love to see your recreations of this look, make sure to tag me on Instagram or Twitter with hash tag #makeupmasochist ! I would love to know what you think of this look and if you would try it, in the comments box below!


For more makeup posts, looks and tutorials please be sure to subscribe to my blog! For more inspiration, photos and videos be sure to follow me on Instagram (@fernonje) and you can also follow my blog on Bloglovin' (Makeupmasochist). If you have any further questions about this look or would like me to do a tutorial on it, please let me know in the comments box or email me (makeupmasochist@gmail.com) !


For more information on the products that I used, please be sure to visit the websites below:

www.maccosmetics.ca
www.sephora.com
www.sigmabeauty.com
www.trueorfalseproducts.com
www.benefitcosmetics.com
www.beautyblendercanada.com

Hope you like it! (Anyone else's temperature rising? It gives me FEVER!!;))


xoxo
Ashley

Wednesday, 26 June 2013

Toronto's Best: The Cupcake Shoppe

Toronto is such an amazing city to explore, there's so many businesses out there offering anything and everything you can think of! I want to showcase some of what I think are Toronto's little gems, the best in food, hospitality and services.


For the first installment of "Toronto's Best", I want to showcase what I think is our best Cupcake Shop in Toronto that I have visited and eaten at so far. Now, I have been on my own personal mission to find the best cupcake shop in Toronto for about 2 years and have tried many from many different bakeries. One rule of thumb that I've learned about cupcake shops, in general, is that the smaller the business - the better the product. I've learned that I enjoy the products produced at small bake shops rather than the products made in mass for chained or franchised bake shops. The less people have heard of it, the better the taste, I find.

So needless to say I was thrilled to stumble upon "The Cupcake Shoppe" on Yonge. This little love affair had started about a year ago, we were on Yonge to watch a movie and after the movie we were in the mood for a coffee with something sweet. Just a little North on Yonge, we found this quaint little shoppe with an amazing display of deliciousness in the window. Since we are always on the look out for Toronto's best cupcake, to pass up the opportunity would not be justified! We had to go in!

The shop is very cute and gives you that vintage cake shop feel, without feeling like its shoved down your throat. It's not pink or overdone with cute stuff, it actually makes you feel like its the real deal and gives you a real sense of nostalgia.

Every time I've gone in, I've dealt with different associates and all have been super helpful and enthusiastic about their products. When the staff is genuinely interested in their own products, it lets you know that the product is good. My first purchase, I was apprehensive - only after being so disappointed with some other hyped up bake shops in the past, but the staff made me feel confident in my choices. There's always plenty of variety and cupcake flavours that everyone can enjoy. I always like to take a few cupcakes home, usually different flavours to try them all!

When we got home and tried their cupcakes for the first time, we were ecstatic and excited to try flavour after flavour! With each cupcake we ate, it made us more and more excited to try the next flavour! What really made these cupcakes so addicting is that they taste home made. All natural, from scratch, a "just baked with grandma" taste and texture. I have yet to have a dry cupcake from this shop and I doubt I ever will!

I want to showcase 3 of my favourite flavours, but keep in mind that they have more than 25 flavours on their roster!


Pretty in Pink Cupcake


This is a raspberry buttercream on a raspberry or chocolate cupcake. I prefer the raspberry cake over the chocolate, only because the raspberry cake is so yummy - even on its own! With the raspberry buttercream it's a piece of pink heaven!  The raspberry chocolate combination is super decadent!


James Brown Cupcake


This is a chocolate buttercream on a chocolate cupcake. The chocolate buttercream is delicious and topped on a moist, rich chocolate cake. Feels naughty-er than devils food cake! A definite must try for the chocolate lovers out there!


Lemon Drop Cupcake


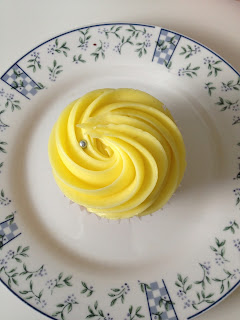
This is a lemon cake topped with a lemon frosting. The frostings are sweeter than the buttercreams, which are creamier. This is my favourite cupcake of the three that I am showcasing. I think what makes this cupcake work so well is the frosting, a buttercream will mask the tartness of the lemon and its the tartness that I love about this cupcake! The lemon cake is nice and light too. So tasty and refreshing at the same time!


Like I said, there are so many great flavours to choose from and they also specialize in making cakes and cupcakes for special occasions. For more information on their flavour menu and services, please be sure to visit the website below:

http://www.thecupcakeshoppe.ca

They have opened another location in Vaughn, in case it might be too hard for you to get downtown. I know this will be a new favourite place to treat yourself after your first visit. It's my favourite way to treat myself or celebrate something special with someone special.  I hope it will be on the tops of your Toronto's best list, or if you are like me - always looking for the perfect cupcake shop, The Cupcake Shoppe is a must try! You will not be disappointed!

If you like food blogs and reviews, be sure to subscribe to my blog for more reviews and urban living. If there is a place or shop that you would like to recommend or request a review for, please let me know in the comments box below! Don't forget to share your experience with The Cupcake Shoppe and let me know what your favourite flavour is!

For more daily photos, videos and posts - be sure to follow me on Instagram (@fernonje) and you can also follow my blog on Bloglovin' (Makeupmasochist). Be sure to email me with any questions or requests makeupmasochist@gmail.com, I love to hear from my readers!

Heres a little cupcake love in action! (Cupcake shown is their Cookie D'Ough Cupcake):

Serious Sugar Rush!

xoxo
Ashley

Thursday, 20 June 2013

Summer Bucket List!

Hello lovelies!

As the official beginning of summer is tomorrow, I've been inclined to make a list of things to do this summer and stick to it! It's so easy to get lazy in the summer heat and distracted with common day to day activities and before you know it- summer is over! This bucket list is my attempt to set goals for this summer, to make sure I get the most out of it!

I've decided to not set myself for failure and choose 8 things to put on my list. (10 seemed too intimidating and 5 not quite enough, so 8 it is!) I chose 8, but if you think you can do more or less than set your own number of goals for your list. Remember not to be too far fetched and make reasonable goals as to not get discouraged along the way for not completing one or focusing all your energy on only one item of your list.

I want to make sure that I've made a well rounded list and not have too many items that would fit under the same category (ie. not all are healthy eating goals, etc).

Here is my list (and I'm sticking to it, so help me God!):


1. Eat more fruit (especially seasonal fruit) - I am not a fruit eater. I can go for days without picking up a fruit, and not even think twice about it. I want to challenge myself to eat at least 1 piece of fruit a day, (Trust me, it's way more than I usually eat) either on its own, in a salad or smoothie. (Garnishing cocktails with fruit would be a yummy and easy way to get my daily intake!)


2. Take at least one weekend to get out of the city - I want to do this more than once this summer, but if I only go once, at least my goal is reached. Any more weekend getaways would be a bonus. I want to try to go camping or just up north and turn off all my connections, so I can really relax and enjoy myself and the scenery.


3. Go through my personal library and read 3 books - I have a huge library of books and I have yet to read them all. Instead of going out and purchasing the latest best sellers, I will make it a point to read at least 3 books that I have yet to crack open. (I will be posting my summer book reads along with other recommendations in a future blog post!)


4. Do more outdoor activities - I already spend a lot of time outside these days, either gardening or walking my pugs. But I want to make a point of doing more activities outdoors, like rollerblading, swimming, hiking or bike riding. Not because I want to lose weight (it would be an added bonus), but just so that I can enjoy the weather and activities. Once winter is here I will be wishing that I could strap on my roller-blades, this way I will utilise the nice weather while its here!


5. Discover and explore an unfamiliar part of the city - Toronto is a MASSIVE metropolis, with so much to discover and enjoy! We are always in Bloor West Village because we are so close and we go to the downtown core pretty often. There is so much of the city that if I were to go I would flit in with the tourists. I am not familiar with the east end of Toronto at all, so maybe I'll put in more effort to get to know the Beaches or maybe the Danforth (it's the Greek part of the city and we all know how much I love Tzaziki!)


6. Make new friends - Summer is a great time (in my opinion) to get out there and meet lots of new people. In the winter everyone likes to stay cooped up, but in the summer everyone is out and about. The vitamin D intake I find helps everyone be more positive and open to making new friends and relationships. Look out new BFF, I'm coming to find you!


7. Master one summer cocktail - I want to find a recipe for a summer type of cocktail and master it so I can serve it at BBQ's. something that I could incorporate some fruit into, so I can cross off this goal and maybe goal #1! 2 for 1 goal! I want to find something maybe frozen, or citrus-y, because that's what makes a great summer cocktail!


8. Do at least one DIY project - Again, I don't want to overwhelm myself with too many things on my plate, so I'm limiting myself to at least 1 DIY project. I would really like to do something cute and funky for my home, but if I happen to do a different type of DIY project, that's ok too!


Well there you have it lovelies, my summer bucket list. I will keep you all posted as to how I'm doing and I hope this inspires you to make your own list. If you have a summer bucket list, please let me know in the comments box below! I would love to read about what you're up to this summer!


Please be sure to subscribe to my blog by email, so you can get notified whenever I post! If you're curious to my reading list for summer, make sure you check back soon! You can also follow my blog on Bloglovin' (MakeupMasochist) and for more daily posts and photos follow my Instagram (@fernonje). You can also email me makeupmasochist@gmail.com if you have any questions, suggestions or requests.


Now get out there and enjoy your summer!!

xoxo
Ashley

Wednesday, 19 June 2013

Maven Manicure: My Julep June Box

Hello dolls!

I've recently been turned in the direction of Julep Nail Polishes and their "Julep Maven" monthly program, that sends you product every month depending on your style.


I'm a total newbie to the program and to Julep all together, never having tried their products. I've always wanted to, just never got around to purchasing a bottle. One day, while reading my daily blogs as part of my morning routine, I stumbled upon an ad claiming that I would get my first box free. Figured it was worth a shot to at least look into!

When I went to the website, they did a mini test on me to see what my personal style was like. This is what they use to determine what type of "Maven" you are and your subscription type. I did the test twice, just to make sure that it correctly calculated my style and I ended up with "Boho Glam". (I was torn between this and "It Girl"). So I subscribed, entered all my information and waited for my first box to arrive.

Shipping took about 2 weeks, as expected from the States, and when I saw the cute little black box, I got super excited! I got excited for 2 reasons- 1) That I finally get to try Julep Polishes, and 2) I can finally do my nails, as I had let them go for 2 weeks waiting for this little black box!

So cute and super generous, they sent me a bonus gift of a nail file and nail polish remover pads to try. I used both the polish remover pad (amazing & quick!) and the nail file worked really well and filed perfectly! They wrapped it all very nicely and girly, making me feel really special!

Feeling like a jewel, I decided to do a jeweled theme manicure. I absolutely love this glitter polish! It comes with silver, gold and pale pink glitter that is super reflective and pretty! I wanted to pair it with a solid cream colour, so I chose this dark cobalt as the base.

I started off as per usual - clean, filed down nails and I put petroleum jelly around the nail beds for fast and easy clean up. I decided that I would use the base colour on all my nail beds, except my ring finger which I will only be putting on the glitter polish.


I painted my first coat of the blue...


And a second coat...


I was actually pleasantly surprised to find out that I only needed 2 coats and not my usual 3. This polish is super opaque with absolutely no streaking what-so-ever!! Who boo! Finally a polish that I don't have to layer on 3 coats and leaves no streaks at all! Winning!!!

Once my base coats were dry, I started on bejeweling my nails with the glitter polish. I started by first putting on a layer of glitter polish on my ring fingers before applying it to the tips of my nails. I only had to use one coat on my nail tips (applies a lot of sparkle with just one coat!), but I did use three coats in my ring fingers - just to get all that sparkle on. Considering there were 3 coats of the glitter polish, it didn't look thick or goopy, which I really liked!


After the last coat of glitter polish, I let it all dry for at least 10 minutes before sealing it with a clear top coat. This way I didn't have to worry about the glitter getting all muddled into the base coat. After waiting about a half hour for it to completely dry, I was done! (Another great thing about this lacquer is that it drys super fast, I didn't have to wait that long for it to try, I just took it as extra precaution.) I was really happy that I can get on with my day so quickly after painting my nails!


And voila!


 With Flash                                                                                     No Flash


I love glitter accent nails, do you?


With Flash                                                                                              No Flash


Are you a Juelp Maven, or would like to be one? Please click on the link below to get yourself subscribed to this amazing company and to get your Julep Maven Box! Mavens get 20% off orders and free shipping! Can you say deal? ;)

http://www.julep.com/rewardsref/index/refer/id/230456/
My Unique Invitation Code is: 17745112 (enter this code when you get on the site!)

Use code "FREEBOX" at checkout  to get your first maven box absolutely free (plus S&H)! You can also find their ads on the side bar and below my blog posts!

If you would like to purchase the colours I used in my manicure, please visit the link below. The nail colours I used today are called "Millie" & " Paris" (LOVING!).


http://www.julep.com 

If you love this manicure or the polishes, be sure to share the love in the comments box below!! Thinking about doing an Ombre tutorial next, what do you think?

If manicure inspiration is your kinda thing, please be sure to subscribe to my blog for more manicure posts! You can also follow my blog on Bloglovin' (MakeupMasochist) and for more daily posts and photos, be sure to follow my Instagram (@fernonje). If you have any questions or manicure requests or ideas, please email me at makeupmasochist@gmail.com

Can't wait till next months delivery and manicure!

xoxo
Ashley